TL;DR
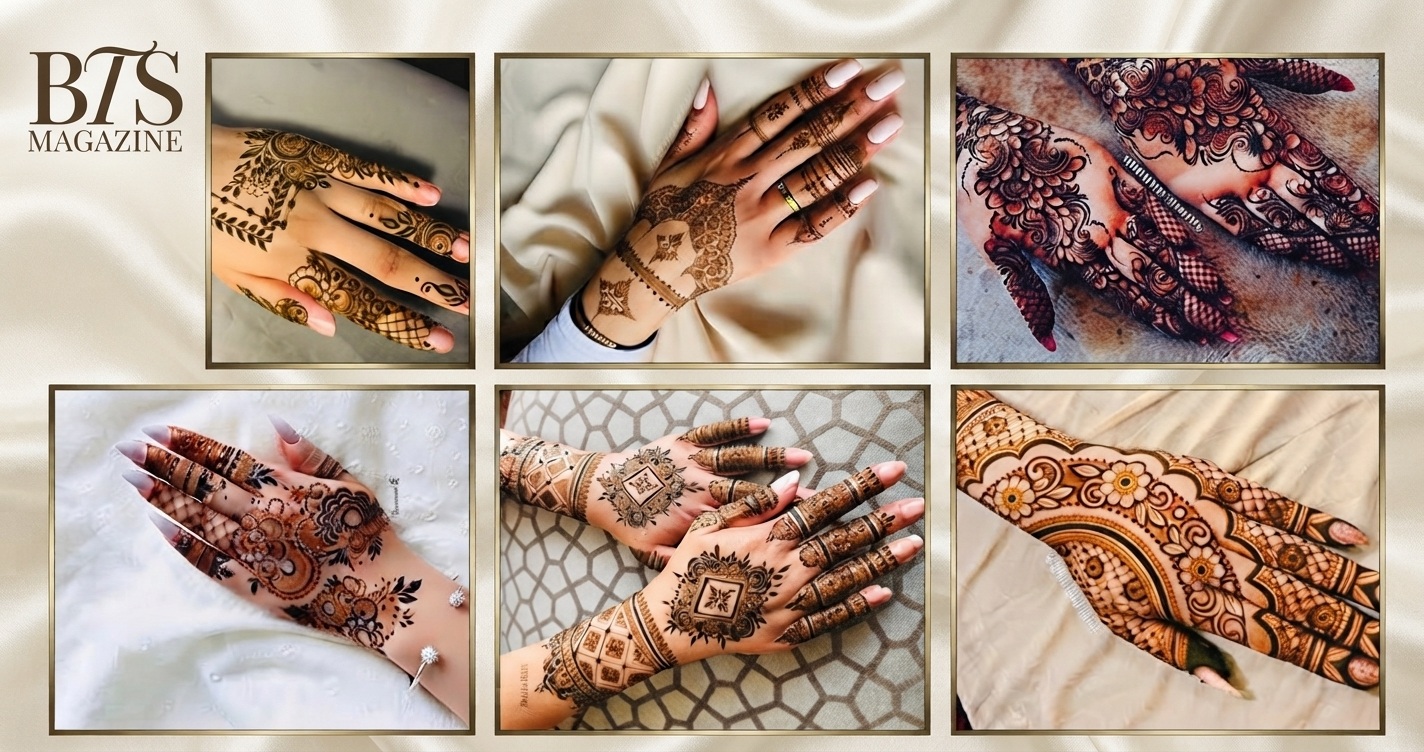
Beautiful Front Hand Mehndi Designs for front hands are all about clean lines, easy flowers, leafy vines, dots, small mandalas, finger patterns, and plenty of open space. You do not need complicated bridal-style detailing to create a beautiful hand design. Start with one main motif, build around it slowly, and keep the pattern balanced. The 20 ideas below are simple enough for beginners while still looking stylish for Eid, weddings, festivals, parties, or casual celebrations.
Featured Snippet: What Is the Easiest Front Hand Mehndi Design for Beginners?
The easiest front hand mehndi designs for beginners use simple flowers, dots, leaves, vines, circles, and basic geometric lines. A small flower in the center of the palm with a leafy trail extending toward one finger is one of the easiest designs to practice. It requires only a few basic strokes, leaves plenty of open space, and can be expanded as your confidence improves.
Mehndi, also called mehendi or henna body art, uses henna-based paste to create temporary decorative patterns on the skin. It is especially associated with celebrations and traditional body art across South Asia and other regions.
Why Simple Front Hand Mehndi Designs Are Perfect for Beginners
Your first mehndi design does not need to cover the entire hand.
In fact, simpler patterns can often look cleaner and more modern because the skin becomes part of the design. Negative space separates flowers, leaves, lines, and other motifs, making each element easier to see.
Beginners also benefit from simple patterns because mistakes are easier to correct. Instead of drawing dozens of tiny details, you can concentrate on controlling the cone, maintaining even pressure, and creating smooth lines.
For the best results, start with designs that use only three or four basic elements, such as:
- Dots
- Curved lines
- Leaves
- Petals
- Circles
- Small paisleys
- Simple grids
Once these shapes feel comfortable, you can combine them into more detailed front hand mehndi designs.
Quick Guide to Beginner Front Hand Mehndi Styles
| Design Style | Difficulty | Best Area | Approximate Detail Level |
|---|---|---|---|
| Single flower | Very easy | Palm | Low |
| Leafy vine | Very easy | Palm to finger | Low |
| Finger bands | Easy | Fingers | Low |
| Mini mandala | Easy | Center palm | Medium |
| Floral trail | Easy | Palm to index finger | Medium |
| Heart motif | Very easy | Center palm | Low |
| Bracelet mehndi | Easy | Wrist | Medium |
| Half-palm floral | Easy | Side of palm | Medium |
| Arabic-inspired vine | Easy | Diagonal palm | Medium |
| Minimal geometric pattern | Easy | Palm and fingers | Medium |
1. Simple Center-Palm Flower Mehndi Design
A single flower in the middle of the palm is one of the safest starting points for a beginner.
Draw a small circle first. Add five or six rounded petals around it, followed by tiny dots between the petals. You can leave the rest of the hand empty or add a few leaves toward the fingers.
The result looks neat without requiring advanced cone control.
Best for: Beginners, teenagers, Eid, small gatherings, and casual events.
2. Cute Leafy Vine Front Hand Design
Leaf vines are forgiving because every leaf does not need to look exactly the same.
Begin near the wrist and draw one gently curved line toward the index finger. Add small leaves alternately on both sides.
A few dots between the leaves make the pattern appear more polished.
This is especially useful when you want simple mehndi designs for front hands that look delicate rather than heavily filled.
3. Small Mandala Mehndi Design
A mandala looks detailed but can be surprisingly simple when built one layer at a time.
Start with a dot or small circle in the center of your palm. Surround it with petals, another circular line, and a final border of dots.
Keep the mandala small for your first attempt. Larger mandalas require more symmetry and steady spacing.
4. Easy Finger-Tip Mehndi Pattern
You do not always need a large palm design.
Decorating only the fingers can create an elegant minimalist look. Try thin horizontal bands, dots, tiny leaves, or small curved lines around each finger.
Leave gaps between the sections so the pattern does not become overcrowded.
This style is particularly useful when you need a quick mehndi design before a party or celebration.
5. Minimal Floral Trail
A floral trail combines two beginner-friendly elements: flowers and vines.
Place one medium flower near the lower palm. Draw a curved vine traveling diagonally upward and add two or three smaller flowers along the way.
Finish the empty spaces with dots or tiny leaves.
Keeping the trail diagonal naturally follows the shape of the hand and gives the design movement.
6. Cute Heart Mehndi Design
A small heart can become the central feature of an easy front hand mehndi pattern.
Draw the heart in the center of the palm and decorate its border with tiny dots or leaves. A simple trail can connect the heart to the middle finger.
This design works particularly well for younger wearers or anyone who prefers playful mehndi instead of traditional dense patterns.
7. Simple Bracelet-Style Mehndi
Bracelet mehndi concentrates most of the design around the wrist.
Create two curved horizontal lines around the wrist and fill the space between them with leaves, dots, small petals, or a basic lattice pattern.
Then add one thin chain-like line toward the middle of the palm.
It creates the appearance of hand jewelry without requiring actual accessories.
8. One-Sided Floral Mehndi Design
You do not have to decorate the entire palm symmetrically.
Instead, place flowers and leaves along one side of the hand while leaving the other side mostly open.
This asymmetrical approach is easier for beginners because exact matching is unnecessary. It also gives the final pattern a modern, airy appearance.
9. Simple Arabic-Inspired Vine
Arabic mehndi styles are often recognized for flowing floral and leafy compositions, while many South Asian designs use denser and more intricate detailing.
For a beginner version, create one diagonal vine across the palm.
Add a medium flower, three or four leaves, and a few paisley shapes. Avoid filling every space.
The result can appear elaborate even though the individual elements are easy to draw.
10. Easy Ring Finger Mehndi
Ring-style mehndi is a beautiful option if you prefer extremely minimal designs.
Create two or three thin bands around one finger. Add a tiny leaf, hanging chain, or dot pattern below the bands.
You can connect the finger design to a small motif on the back or center of the palm if you want more detail.
11. Half-Flower Palm Design
Instead of drawing a complete flower, place half of a large flower along the outer edge of the palm.
Only part of the motif is visible, which makes symmetry much easier.
Add curved leaves toward the center and finish with spaced dots.
This technique gives a creative look while requiring fewer individual elements.
12. Simple Paisley Mehndi Design
Paisley is one of the most versatile shapes used in mehndi patterns.
Draw a curved teardrop first. Add a smaller curved line inside it and decorate the outer edge with tiny petals or dots.
One large paisley can become the main palm motif, or you can connect several small ones with a vine.
For beginners, larger paisleys are generally easier to control than tiny ones.
13. Dotted Chain Mehndi
If your line work still feels shaky, try building more of the design with dots.
Create a small flower near the palm and connect it to a finger using evenly spaced dots.
You can alternate large and small dots to create a jewelry-chain effect.
This pattern requires very little filling and can be completed quickly.
14. Easy Lotus Mehndi Design
A lotus can look sophisticated without being complicated.
Start with three pointed petals. Add another row of petals behind them and place short lines or dots underneath.
The lotus can sit in the center of the palm or near the wrist.
A thin leafy stem extending toward one finger completes the design without making it too busy.
15. Simple Sun Mehndi Pattern
Draw a small circle in the middle of the palm and surround it with short straight or curved rays.
Add dots between the rays for texture.
You can leave the design exactly like this for an ultra-minimal look or decorate two fingers with matching lines and dots.
The repeated shapes make this one of the easiest patterns to memorize.
16. Floral Finger Chain Design
This pattern creates the appearance of delicate hand jewelry.
Draw a small flower on the palm and connect it to the middle or ring finger using two thin curved lines.
Decorate the connecting lines with tiny leaves or dots.
Keep the finger itself lightly decorated so the central chain remains the focus.
17. Simple Checkered Mehndi Pattern
Geometric mehndi can be easier than floral artwork for people who feel more comfortable drawing straight lines.
Create a small diamond or square section on the palm. Divide it with diagonal lines to form a basic grid.
Place a dot inside every second section.
Combine the grid with leaves around the edges to soften the geometric appearance.
18. Tiny Flower Cluster
Instead of drawing one large centerpiece, group three small flowers together.
Place the cluster slightly off-center on the palm. Add leaves around it and extend one narrow vine toward the index finger.
The flowers do not need to be identical. Slight differences can make the pattern feel more natural.
19. Simple Moon and Stars Mehndi Design
A crescent moon surrounded by dots and tiny stars creates a cute, modern pattern.
Draw the crescent first and place several small decorative shapes around it.
Keep plenty of blank space between them.
The design is especially suitable for people looking for cute simple mehndi designs for Eid or other festive occasions.
20. Minimal Full Front Hand Mehndi
Once you are comfortable with smaller patterns, combine several simple elements into a light full-hand design.
Start with a flower or mandala in the center. Connect it to one or two fingers with vines. Decorate the remaining fingers with bands, dots, leaves, or tiny flowers.
The secret is not to fill every empty space.
A beginner full-hand design usually looks cleaner when you repeat a limited number of shapes rather than introducing a new motif in every section.
How to Apply Simple Mehndi on Your Front Hand
A clean application starts before the cone touches your skin.
First, make sure the hand is clean and dry. Avoid applying heavy lotion or oil immediately before drawing because a slippery surface can make line control more difficult.
Next, practice squeezing a few lines onto paper or another suitable practice surface. The goal is to understand how much pressure produces a thin line and how much creates a thicker one.
When working on the hand:
- Draw the largest central shape first.
- Add vines or connecting lines.
- Build smaller flowers and leaves around the main motif.
- Fill awkward gaps with dots rather than complicated shapes.
- Stop before the hand looks overcrowded.
A common beginner mistake is continuing to add details simply because empty skin remains visible. Negative space is part of the design.
How to Hold a Mehndi Cone for Better Control
Hold the cone similarly to a pen, but avoid gripping it too close to the opening.
Apply gentle, consistent pressure with your fingers or palm while guiding the tip above the skin.
Try not to drag the tip directly across the skin. Allow the paste to fall in a controlled line as you move your hand.
Before attempting an entire design, practice:
- Straight lines
- S-shaped curves
- Circles
- Dots of equal size
- Five-petal flowers
- Rows of leaves
Once these basic strokes become consistent, most beginner mehndi designs become much easier.
Common Beginner Mehndi Mistakes to Avoid
Starting With a Very Complicated Design
Dense bridal patterns may look beautiful, but they leave little room for correction.
Start with one central motif and gradually expand the design.
Drawing Everything Too Small
Tiny details require precise control.
Use larger petals, paisleys, leaves, and circles while learning.
Trying to Make Both Sides Perfectly Symmetrical
Perfect symmetry takes practice.
Diagonal vines, one-sided flowers, and asymmetrical patterns are much more forgiving.
Filling Every Empty Space
More mehndi does not automatically mean a better design.
Blank areas help individual motifs stand out.
Changing Styles Too Often
A flower, geometric grid, paisley, mandala, and several unrelated motifs can make a small design feel confusing.
Choose two or three complementary elements and repeat them.
How Long Does Mehndi Last?
Henna body art is temporary. Natural henna typically creates reddish-orange to brown stains that gradually fade as the outer layers of skin exfoliate. Wikipedia’s overview of henna notes that stains generally remain visible for several days and may gradually disappear over roughly one to three weeks, although actual longevity varies.
The final result depends on factors such as the product used, skin area, individual skin characteristics, application, and aftercare.
Palms often produce strong-looking stains because the skin in this area responds well to henna application.
How to Help Your Mehndi Develop Well
Follow the directions supplied with the henna product or by your professional artist.
In general, avoid smudging the wet pattern and give the paste enough time to dry and develop according to the product instructions.
Remember that fresh natural henna normally does not appear deep brown immediately after paste removal. Its appearance develops with time.
Do not rely on questionable chemical additives simply because they promise an instantly dark or black result.
Important Henna Safety Tip
Be cautious with products sold as “black henna.”
The U.S. Food and Drug Administration warns that products marketed as black henna may contain p-phenylenediamine (PPD), which can cause dangerous skin reactions in some people. The FDA also notes that PPD is not permitted for direct application to the skin in cosmetics in the United States.
If you experience significant redness, swelling, blistering, severe itching, pain, or other concerning symptoms after temporary body art, seek appropriate medical advice. The American Academy of Dermatology also describes allergic reactions associated with temporary tattoos containing black dye and PPD.
When purchasing henna, choose a trustworthy seller, check available ingredient information, and avoid assuming that every product labeled “natural” is identical.
Which Front Hand Mehndi Design Should a Complete Beginner Try First?
For your first attempt, choose either a single flower, small mandala, or leafy diagonal vine.
A leafy vine is particularly forgiving because minor variations in leaf size do not ruin the overall appearance.
If your curves are difficult to control, begin with dots and simple finger bands. If your straight lines are stronger than your curves, try geometric grids or bracelet-style mehndi.
The best beginner design is not necessarily the smallest. It is the design made from shapes you can repeat confidently.
How to Make Simple Mehndi Look More Professional
Good spacing makes a bigger difference than excessive detail.
Try repeating the same leaf shape throughout the pattern. Maintain similar spacing between dots. Keep major lines smooth and avoid filling every open section.
Another useful technique is varying line weight. A slightly thicker outline around a flower combined with thinner interior lines gives the design more visual depth.
Most importantly, decide where the design should end before you begin. A deliberate stopping point makes a simple pattern feel finished rather than incomplete.
Front Hand vs. Back Hand Mehndi for Beginners
Front hand designs can be especially rewarding because the palm gives you a broad central area for flowers, circles, paisleys, and mandalas.
Back-hand mehndi often uses bracelet, jewelry, vine, and finger-focused compositions because the shape and visual structure are different.
If you are practicing on yourself, however, the bigger challenge may simply be drawing with your non-dominant hand.
Practice individual motifs on paper first, then recreate them on the hand using larger movements.
FAQs About Beginner Cute Simple Mehndi Designs for Front Hands
What is the easiest mehndi design for a beginner?
A single flower with a leafy vine is one of the easiest options. It uses basic curves, petals, dots, and leaves while avoiding complex filling.
How can beginners practice mehndi?
Practice straight lines, circles, dots, leaves, petals, curves, and paisleys individually before combining them. Repeating the same shape helps develop steady cone pressure and hand control.
Which mehndi design looks good on small hands?
Small mandalas, diagonal floral vines, finger bands, tiny flower clusters, and minimalist jewelry-style patterns work especially well because they do not overwhelm the available space.
Can simple mehndi look elegant?
Yes. Clean spacing, balanced placement, repeated motifs, and smooth lines often make minimalist mehndi look highly polished. Complexity is not necessary for an elegant result.
What should I draw first when applying front hand mehndi?
Begin with the largest or most important motif, such as the central flower or mandala. Then create connecting vines before adding small fillers such as leaves and dots.
Are Arabic-style mehndi designs suitable for beginners?
Simplified Arabic-inspired designs can be excellent for beginners because flowing vines, flowers, leaves, and open spaces allow you to create an attractive design without covering the entire hand.
How do I prevent my beginner mehndi design from looking messy?
Limit yourself to two or three main motifs, maintain open spaces, keep similar elements roughly consistent in size, and avoid adding unnecessary details after the composition already looks balanced.
Internal Linking Suggestions
To strengthen topical authority, link this article naturally to related content such as:
- Easy Back Hand Mehndi Designs for Beginners
- Simple Eid Mehndi Designs
- Arabic Mehndi Designs for Front Hands
- Small Mehndi Designs for Kids and Teenagers
- How to Apply Mehndi at Home
- Simple Finger Mehndi Designs
- Bridal Mehndi Designs and Inspiration
These supporting articles create a useful mehndi content cluster and help readers continue exploring relevant ideas.
External Authority Link Suggestions
For additional factual information, suitable authority references include:
- U.S. Food and Drug Administration guidance on henna, mehndi, and black henna
- American Academy of Dermatology information on reactions to temporary tattoos
- Wikipedia’s overview of mehndi and traditional henna body art
Use external links where they genuinely help readers rather than adding them simply for SEO.
Final Thoughts
You do not need years of practice to create attractive mehndi. The most successful beginner cute simple mehndi designs for front hands usually begin with basic shapes: a flower, a vine, a few leaves, a mandala, or a row of dots. Master those elements first, leave enough open space, and gradually add detail as your cone control improves. Whether you are preparing for Eid, a wedding, a festival, or simply practicing at home, simple patterns can look just as beautiful as heavily detailed designs when they are applied neatly. If you would also like to understand the cultural background, terminology, and traditional uses of this art form, the Wikipedia page about Mehndi provides a useful introduction to the history and practice of mehndi around the world.