

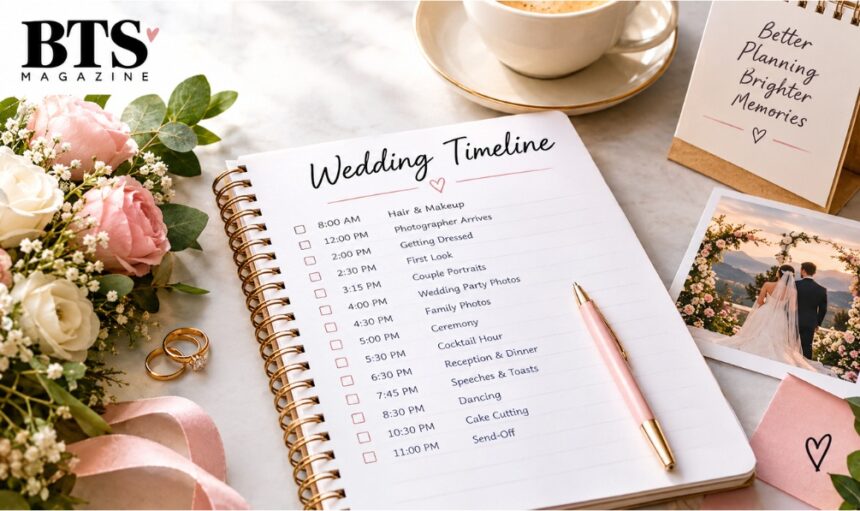
Planning a wedding is exciting, but the day itself can quickly become stressful when there is no realistic schedule. Hair and makeup, getting dressed, photography, the ceremony, dinner, speeches, dancing, transportation, and the final send-off all need to fit together. Even a small delay in one part of the day can affect everything that follows.
- What Is a Wedding Timeline?
- How to Plan a Wedding Timeline Step by Step
- 1. Start With Your Ceremony Time
- 2. Work Backward From the Ceremony
- 3. Check the Sunset Time
- 4. Schedule Hair and Makeup Carefully
- 5. Decide Whether You Want a First Look
- 6. Give Photography Enough Time
- How Much Time Should You Allow for Wedding Activities?
- Sample Wedding Timeline for a 5 PM Ceremony
- How to Build a Timeline With or Without a First Look
- Why Buffer Time Matters
- Common Wedding Timeline Mistakes to Avoid
- Scheduling Every Minute
- Forgetting Travel Time
- Starting Hair and Makeup Too Late
- Not Allowing Enough Time for Family Photos
- Ignoring Sunset
- Planning Too Many Reception Events
- Forgetting to Eat
- Keeping the Timeline Private
- What Should a Vendor Timeline Include?
- Wedding Timeline Template
- How to Make Your Wedding Timeline Less Stressful
- FAQS About How to Plan a Wedding Timeline
- When should you start planning a wedding timeline?
- How long should a wedding timeline be?
- What time should hair and makeup start for a 5 PM wedding?
- How much time should you allow for wedding photos?
- Should you have a first look?
- How much buffer time should you add?
- Who should receive the wedding timeline?
- Final Thoughts
The good news is that learning how to plan a wedding timeline does not have to be complicated. The easiest approach is to begin with the events that cannot move, such as the ceremony and sunset, and then work backward. From there, you can add photography, preparation, travel, reception activities, and enough buffer time to handle unexpected delays.
A strong wedding timeline is not about controlling every minute. It is about creating enough structure for everyone to know what happens next while still leaving room to enjoy the day.
What Is a Wedding Timeline?
A wedding timeline is a detailed schedule that shows when the major events of your wedding day will happen. It can start with hair and makeup and continue through the final dance or grand exit.
A typical timeline may include:
- Hair and makeup
- Photographer and videographer arrival
- Getting dressed
- First look
- Couple portraits
- Wedding-party photos
- Family photos
- Guest arrival
- Ceremony
- Cocktail hour
- Grand entrance
- Dinner
- Speeches and toasts
- First and parent dances
- Cake cutting
- Open dancing
- Last dance
- Grand exit
Every wedding is different, and traditions can vary by culture, religion, venue, and personal preference. The broader traditions surrounding weddings are also explained in Wikipedia’s overview of weddings.
The goal is not to copy another couple’s schedule. Your timeline should match your ceremony time, venue, guest count, vendors, transportation, photography plans, and priorities.
How to Plan a Wedding Timeline Step by Step
1. Start With Your Ceremony Time
Your ceremony is usually the most important fixed point of the day. Once you know when it begins, you can work backward to determine when everyone needs to be ready.
For example, if the ceremony starts at 5:00 PM, you might plan:
- 4:30 PM — Guests begin seating
- 4:15 PM — Wedding party prepares for the processional
- 3:45 PM — Family photos finish
- 3:15 PM — Wedding-party photos
- 2:30 PM — First look and couple portraits
- 2:00 PM — Getting dressed
- 12:30 PM — Photographer arrives
- Morning — Hair and makeup
These times are only examples, but the backward-planning method makes it much easier to see how much time you actually have.
2. Work Backward From the Ceremony
Once the ceremony time is fixed, work backward rather than randomly assigning times to activities.
Ask yourself:
What needs to happen immediately before the ceremony?
Then ask:
What needs to happen before that?
This approach helps you identify important deadlines. It also prevents a common problem where couples schedule photography, dressing, and beauty appointments too close to the ceremony.
3. Check the Sunset Time
If beautiful natural-light portraits are important to you, sunset should be another major anchor in your schedule.
Find the exact sunset time for your wedding date and location. Sunset changes throughout the year, so it is better to check the actual date instead of copying the timeline from another wedding.
If sunset is at 7:30 PM, for example, you may want to reserve approximately 20–30 minutes around that period for romantic couple portraits.
Think about travel to the photo location as well. If it takes 10 minutes to reach the location, that travel time needs to be part of the photography block.
4. Schedule Hair and Makeup Carefully
Hair and makeup can easily become one of the biggest sources of wedding-day delays.
Your schedule may need to include services for:
- The bride
- Bridesmaids
- Parents or family members
- Groom’s preparation
- Final touch-ups
- Getting dressed
Do not schedule the final appointment immediately before the ceremony. If something takes longer than expected, there will be no time to recover.
It is much better to finish a little early and have time for touch-ups, photographs, water, and a moment to relax.
5. Decide Whether You Want a First Look
A first look can significantly change your wedding timeline.
If you choose to see each other before the ceremony, you can potentially complete your couple portraits, wedding-party photos, and some family photographs before guests arrive.
This can create more free time after the ceremony.
Without a first look, many of those photographs may need to happen during cocktail hour. That can reduce the amount of time you have with your guests.
Neither choice is automatically better. The important thing is to make the decision early enough that your photographer can build the schedule around it.
6. Give Photography Enough Time
Couples often underestimate how much time wedding photography requires.
Your photographer may need separate blocks for:
- Detail photographs
- Getting-ready photos
- Couple portraits
- Wedding-party photos
- Immediate family photos
- Extended family photos
- Ceremony coverage
- Reception details
- Golden-hour portraits
Create a shot list before the wedding and share it with your photographer.
It is also useful to appoint a family member or trusted friend who can gather relatives for group photos. Otherwise, you may spend valuable minutes searching for people who have wandered away.
How Much Time Should You Allow for Wedding Activities?
There is no universal answer because every wedding has different requirements. However, these approximate ranges are useful when creating your first draft:
| Wedding Activity | Approximate Time |
| Hair and makeup | 2–4+ hours |
| Getting dressed | 20–40 minutes |
| First look | 10–20 minutes |
| Couple portraits | 20–40 minutes |
| Wedding-party photos | 20–30 minutes |
| Family photos | 20–45 minutes |
| Ceremony | 20–60 minutes |
| Cocktail hour | 45–60 minutes |
| Grand entrance | 5–10 minutes |
| Dinner | 45–90 minutes |
| Toasts | 15–30 minutes |
| First and parent dances | 10–20 minutes |
| Cake cutting | 5–10 minutes |
| Open dancing | 60+ minutes |
| Send-off | 10–20 minutes |
Treat these figures as starting points rather than strict rules. A large wedding with several family groups may require considerably more time than an intimate celebration.
Sample Wedding Timeline for a 5 PM Ceremony
Here is a practical example of how a wedding day could flow.
Getting Ready
12:00 PM — Hair and makeup continues
The wedding party finishes beauty services while everyone prepares for the afternoon.
1:00 PM — Photographer arrives
The photographer captures invitations, rings, shoes, flowers, attire, and other meaningful details.
1:45 PM — Getting dressed
Allow enough time for everyone to get dressed without feeling rushed.
2:15 PM — Final preparation and buffer
Use this time for touch-ups, gathering personal belongings, and preparing for the first look.
First Look and Portraits
2:30 PM — First look
The couple sees each other before the ceremony.
2:45 PM — Couple portraits
Take romantic portraits while everyone is already dressed and ready.
3:15 PM — Wedding-party photos
Complete the larger group photographs.
3:45 PM — Family photos
Photograph the most important family combinations.
4:15 PM — Final buffer
Everyone can freshen up, use the restroom, hide from arriving guests, and prepare for the ceremony.
Ceremony
4:30 PM — Guest seating
Guests begin taking their seats and ceremony music starts.
5:00 PM — Ceremony begins
The wedding ceremony starts.
5:30 PM — Ceremony ends
Guests move toward cocktail hour while any remaining photographs are completed.
Cocktail Hour
5:30–6:30 PM — Cocktail hour
Guests enjoy drinks and appetizers.
If most photographs were completed before the ceremony, the couple can spend more of this period with their guests. If there was no first look, some of this time may need to be reserved for photography.
Reception
6:30 PM — Grand entrance
The wedding party and couple are introduced.
6:40 PM — First dance
The couple shares their first dance.
6:50 PM — Welcome and dinner
A short welcome leads into dinner service.
7:45 PM — Toasts
Selected family members, the best man, maid of honor, or other speakers give their speeches.
8:00 PM — Parent dances
Parent dances can be scheduled here if they are part of the celebration.
8:15 PM — Open dancing
The dance floor opens for everyone.
9:15 PM — Cake cutting
Bring guests together for the cake-cutting moment.
9:30 PM — More dancing
Return to the dance floor and allow the celebration to continue.
10:30 PM — Last dance
Give guests a clear indication that the evening is approaching its end.
10:45 PM — Grand exit
The couple leaves with their planned send-off.
How to Build a Timeline With or Without a First Look
With a First Look
A first look can make the day more flexible because several photographs can be completed before the ceremony.
A possible sequence is:
- 2:30 PM — First look
- 2:45 PM — Couple portraits
- 3:15 PM — Wedding-party photos
- 3:45 PM — Family photos
- 5:00 PM — Ceremony
- 5:30 PM — Cocktail hour
The biggest benefit is that more of the post-ceremony period can potentially be spent celebrating with guests.
Without a First Look
If you want the traditional first meeting at the ceremony, more photographs may need to happen afterward.
For example:
- 5:00 PM — Ceremony
- 5:30 PM — Family photos
- 6:00 PM — Wedding-party photos
- 6:20 PM — Couple portraits
- 6:30 PM — Reception
This can work, but there is less flexibility. Talk with your photographer before finalizing the schedule so everyone understands how much time is available.
Why Buffer Time Matters
One of the biggest wedding timeline mistakes is scheduling every activity back-to-back.
Real weddings rarely run perfectly. Hair may take longer, family members may be difficult to locate, transportation may be delayed, or guests may take longer to find their seats.
A practical starting point is to allow 10–15 minutes of flexibility around major blocks, with larger buffers for travel, large groups, and complicated transitions.
Pay particular attention to:
- Getting ready
- Family photographs
- Transportation
- Ceremony-to-reception transitions
- Dinner-to-dancing transitions
Buffer time is not wasted time. It is what protects the rest of your schedule when something unexpected happens.
Common Wedding Timeline Mistakes to Avoid
Scheduling Every Minute
A schedule with no breathing room can make the entire day feel rushed.
Forgetting Travel Time
Do not count only the driving time. Include loading, parking, walking, traffic, and getting everyone organized.
Starting Hair and Makeup Too Late
Work backward from the time everyone needs to be completely ready.
Not Allowing Enough Time for Family Photos
Large groups require more organization than couples often expect. Prepare a shot list and assign someone to gather people.
Ignoring Sunset
If natural-light photography matters to you, protect the sunset portrait window.
Planning Too Many Reception Events
You do not need to include every traditional activity. Choose the moments that are meaningful to you.
Forgetting to Eat
Protect time for the couple to eat and drink water. It is surprisingly easy to spend the entire reception talking to guests and forget dinner.
Keeping the Timeline Private
Your planner, photographer, videographer, caterer, DJ, venue team, transportation provider, and wedding party should know the final plan.
What Should a Vendor Timeline Include?
A vendor-facing schedule should contain more than just times. Include:
| Time | Activity | Location | People Needed | Responsible Vendor |
| 12:00 PM | Hair & makeup | Bridal suite | Wedding party | Hair/Makeup |
| 1:00 PM | Photographer arrival | Bridal suite | Couple | Photographer |
| 2:30 PM | First look | Garden | Couple | Photographer |
| 3:15 PM | Wedding-party photos | Garden | Wedding party | Photographer |
| 4:30 PM | Guest seating | Ceremony area | Guests | Coordinator |
| 5:00 PM | Ceremony | Main venue | Everyone | Officiant |
| 5:30 PM | Cocktail hour | Patio | Guests | Catering |
| 6:30 PM | Reception | Ballroom | Everyone | DJ/Coordinator |
Also include important notes, vendor contact information, travel details, and backup plans when necessary.
Wedding Timeline Template
You can use this simple structure to build your own schedule:
Wedding Day Timeline
Wedding Date: [Date]
Ceremony Time: [Time]
Ceremony Location: [Location]
Reception Location: [Location]
Sunset: [Time]
Getting Ready
- [Time] — Hair and makeup begins
- [Time] — Photographer arrives
- [Time] — Detail photos
- [Time] — Getting dressed
- [Time] — Final touch-ups
- [Time] — Buffer
Before the Ceremony
- [Time] — First look
- [Time] — Couple portraits
- [Time] — Wedding-party photos
- [Time] — Family photos
- [Time] — Final preparation
- [Time] — Guest seating
Ceremony
- [Time] — Processional
- [Time] — Ceremony begins
- [Time] — Ceremony ends
- [Time] — Recessional
Cocktail Hour
- [Time] — Cocktail hour begins
- [Time] — Remaining family photos
- [Time] — Golden-hour portraits
- [Time] — Guests move to reception
Reception
- [Time] — Wedding-party entrance
- [Time] — Grand entrance
- [Time] — First dance
- [Time] — Welcome
- [Time] — Dinner
- [Time] — Toasts
- [Time] — Parent dances
- [Time] — Cake cutting
- [Time] — Open dancing
- [Time] — Last dance
- [Time] — Grand exit
How to Make Your Wedding Timeline Less Stressful
The best wedding timeline should make your day feel easier, not make you constantly check the clock.
First, assign one person to manage the schedule. This could be your wedding planner, coordinator, trusted family member, or another responsible person.
Second, keep yourself out of logistics. If the DJ has a question or a vendor needs information, you should not have to deal with it while getting married. Give vendors a clear point of contact.
Third, protect time for food and water. You deserve to enjoy your own reception.
Finally, send the final timeline to all important vendors and members of the wedding party. Everyone should be working from the same version.
FAQS About How to Plan a Wedding Timeline
When should you start planning a wedding timeline?
Start creating a rough timeline once your venue, ceremony time, reception details, and major vendors are confirmed. Finalize it after you know vendor arrival times, transportation requirements, photography needs, and venue restrictions.
How long should a wedding timeline be?
The schedule can cover the entire wedding day, from getting ready through the final exit. Many weddings involve approximately 8–12 hours of activities or vendor coverage, although this varies significantly.
What time should hair and makeup start for a 5 PM wedding?
There is no universal start time. It depends on how many people need services and how quickly the beauty team works. Work backward from the time everyone needs to be ready and add a buffer.
How much time should you allow for wedding photos?
Create separate blocks for detail photos, couple portraits, wedding-party photos, and family photographs. The required time depends on your shot list and group size.
Should you have a first look?
A first look can make your schedule more flexible because some portraits can be completed before the ceremony. However, couples who prefer a traditional ceremony reveal can absolutely build a successful timeline without one.
How much buffer time should you add?
A useful starting point is 10–15 minutes of flexibility around major activities, with additional time for large groups, travel, and complicated transitions.
Who should receive the wedding timeline?
Share the final version with your planner or coordinator, photographer, videographer, DJ or band, caterer, venue team, transportation provider, officiant, and wedding party.
Final Thoughts
Learning how to plan a wedding timeline is really about creating a realistic flow rather than trying to control every minute.
Start with the ceremony, work backward through getting ready and photography, check the sunset, account for transportation, and build buffers into important transitions. Then organize the post-ceremony portion around cocktail hour, dinner, speeches, dancing, and the final send-off.
Most importantly, leave yourself room to enjoy the day.
A good wedding timeline provides enough structure to keep vendors and guests organized while still giving you flexibility when things do not go exactly according to plan. When everyone understands the schedule and someone else handles the clock, you can focus on what matters most: celebrating with the people you love.
Read also: Musol Solvent vs Other Solvents: Key Differences Explained